Don’t let your crown “kiss” your baffle..and other great lighting tips for kitchen design!
We love it when you share!
Rules for lighting a kitchen
I have been called on the carpet by a couple of readers to give it up on my “rules” for lighting a space well…specifically kitchens. So, okay! I am guilty of pointing out the bad and the good without some follow up substance.
I will wager many designers have different opinions on a few of these tips but I swear by my “rules” because time after time, we end up with not just a well lit space but one that can be “dressed” differently with the lighting to fit many moods. I.E. serious cooking, entertaining, craft time with the kids, late night snack with hubby and so on.
I think often lighting is poorly done because no one thinks so much about it at the outset of planning( I used to be guilty of this too!) and then when budgets get tight, it is the first thing that seems to go. But if you do not have the proper lighting in a kitchen, you are simply killing your design.
Lighting tips for the best kitchen design:
**The kitchen is undeniably the focal point of almost any home and family.
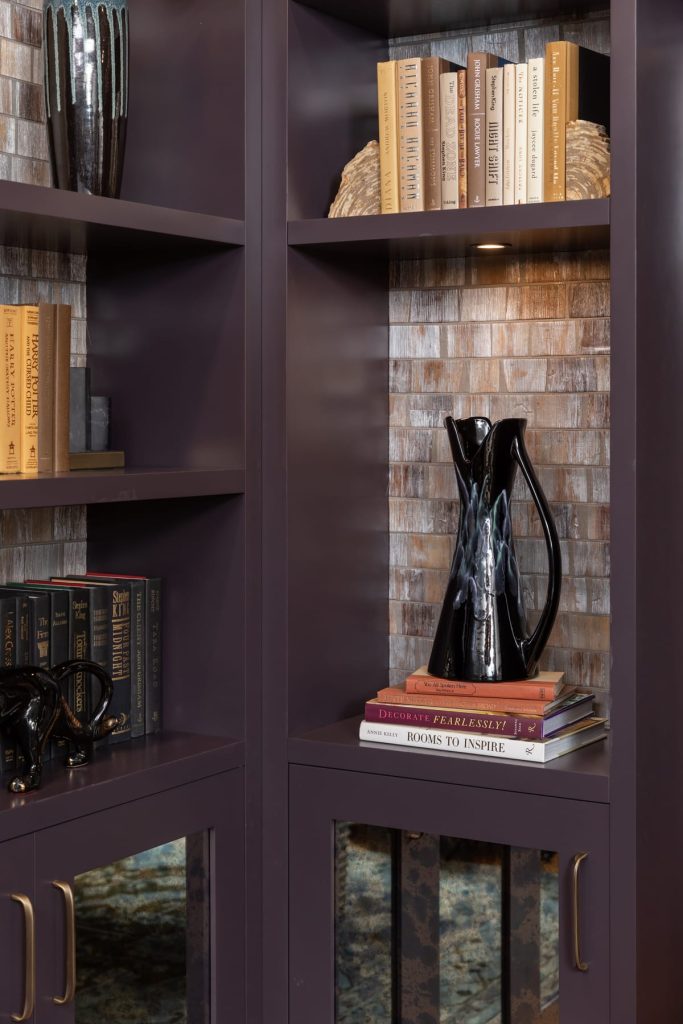
Thus, the lighting needs to be humanizing and contribute to the overall warmth and welcoming nature of the space. This means layering the lighting. There is no one device that can fill all the above needs. The old school one main light centered in the middle of the room cannot multitask. Layering means creating ambient light, task light and general light. And, they need to be woven together to work in conjunction with one another.We like well hidden puck lights for washing a wall, a cabinet or lighting an accent space in a bookshelf.
**Recessed can lights are a good choice for general lighting.
But, left to most electricians, the lights will end up in some sort of grid pattern. I disagree with this concept. First off, it may look good on the floor plan but who walks around looking up to see the symmetry? NO ONE. So, the can lights need to be placed where they are needed! For example, I want a light in front of my refrigerator. I do not care if the other can lights are out from the wall the same distance. Sometimes it makes sense, often it does not. I refer to the typical grid pattern as little soldiers marching in a line. And in fact, (gasp!) I think it looks worse to have can lights all lined up in a row and calls more attention to them. And, let’s face it, no one “loves” recessed can lights so let’s let them do their job but not make a grand announcement they are there.
**Make sure recessed cans are not too close to the cabinets thinking you are lighting the countertop.
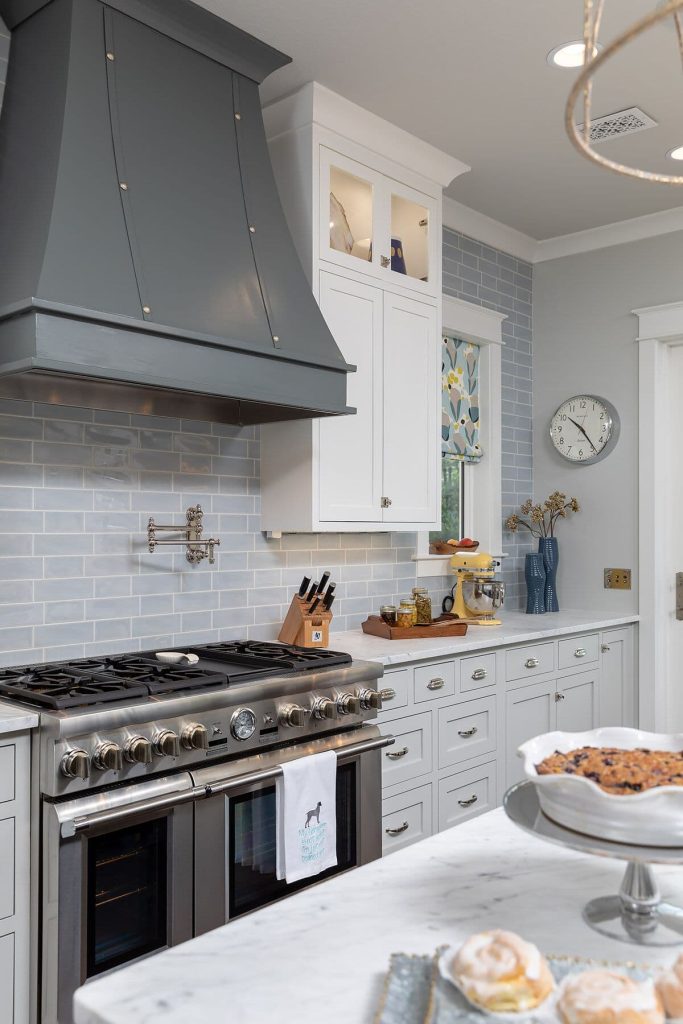
I see this often on plans. Depending on your ceiling height and size of cans, the cone of light will “break” on the cabinets if too close and you effectively lose much of the light into the cabinetry but also you should not put them directly over where you will stand or you are creating shadows. AND, whatever you do, please make sure that your crown molding clears the trim of the can light by a good margin. Sadly, I walk into homes all the time that have a “grid” lighting plan and the refrigerator crown molding is “kissing” (as cheryl calls it) the trim. This is the epitome of bad planning and I would hang up my tape if I let this happen to me!
**SWITCH all lighting differently!
This helps create the mood. Think about the switching carefully! Do NOT let your electrician makes this decision for you. If you do not have an architect, designer or a really savvy contractor, then you must learn yourself and think it through.
**Put all kitchen lighting on dimmers. Enough said.
**Don’t use halogen puck lights under the cabinetry.
OOOOOKKKKK, am sure this will tick off a few designers and maybe even an architect or two. But I stand by my recommendation to use LED or even slimline fluorescents. Typical halogen puck lights burn very hot. I have seen a child get a burn from touching one. ( why she was allowed to climb all over the counter is another story) AND they create pin point light and I prefer a strip to give off more even light. I like Alico because they are easy to use and have a solid metal housing but there are many brands that are good. Now, the small puck lights can be used in display areas etc with no problem but even then I prefer Xenon. (which are still hotter than fluorescents) But when doing the undercabinet lighting, use strips.
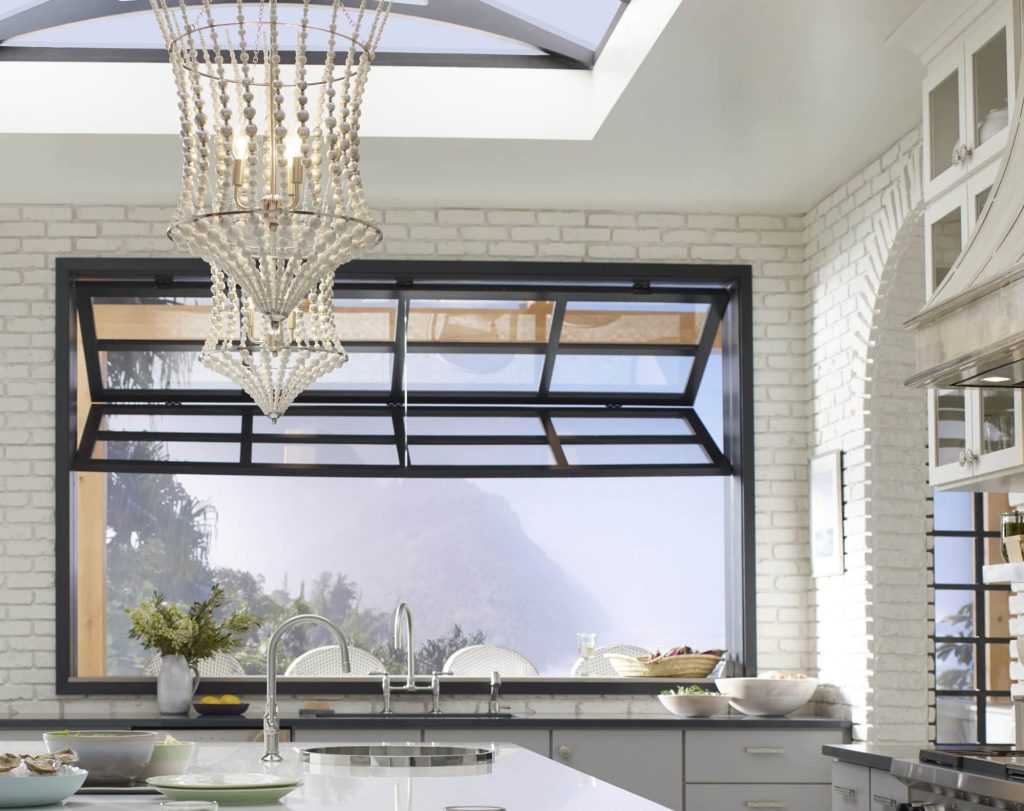
**Don’t forget about natural light!
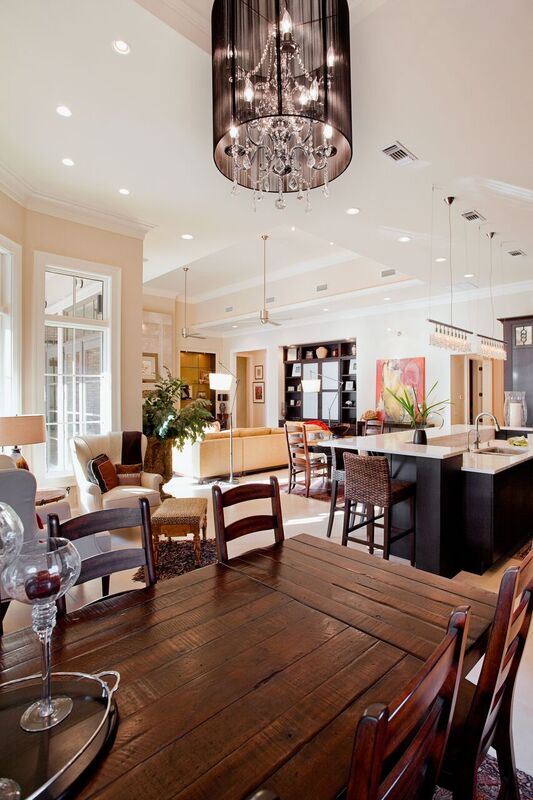
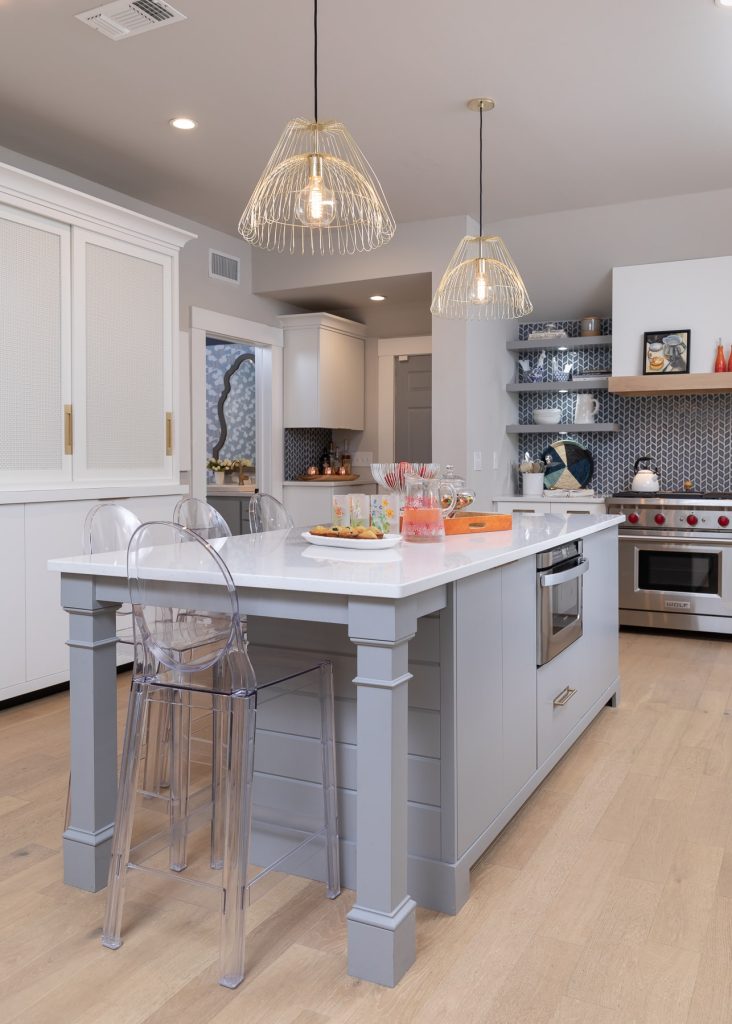
If you are building new or can work in additional windows, do it. There is no substitution for natural light. I will eschew the long rows of upper cabinets any day to work in an additional windows! Think about Solatube options. This is a better version of a skylight. In my area, skylights can be problematic with our weather problems but done correctly ( and this is the key) it can be a great source of daylight. But, plan locations well!In this kitchen we did for Kohler and Silestone, we designed a lift up garage door style outside to patio and a green house glass ceiling.**Work in decorative lighting. This is the essential way to add personality and set a mood in your kitchen in the form of pendants, mini chandeliers or even wall sconces. I loooove wall sconces in a kitchen. This type of lighting transforms the kitchen into a living space not just a cooking space.Decorative lighting adds a ton of style!
**Consider using small puck lights in a glass fronted cabinet.
This adds little cost at the outset and provides great effect. Also, I like to use a small light inside a deep corner cabinet. Remember, I have “crossed over” to the age where good lighting is critical! ( no age jokes, please!)
Lit upper cabinets is always the right decision.
**When laying out lighting for pendants over an island, do yourself ( and your electrician) a favor and draw the outline of the cabinetry/countertop on the floor and get exact measurements.
Do not rely on the plans or almost assuredly, they will be wrong and have to be moved.
** Remember the older you get the harder it is to see.
( trust me on this, one day you wake up and LITERALLY, you need bifocals or progessive lenses) Plan ahead. And don’t forget a light directly over the sink to help “see” the dirt!LAYER YOUR LIGHTING AND PROVIDE ABUNDANT LIGHTSWITCH DIFFERENTLY DEPENDING ON USAGEPUT EVERYTHING YOU CAN ON DIMMERSLOOK FOR WAYS TO INTRODUCE MORE NATURAL LIGHT
That’s so funny to hear someone else use the word “kiss” in reference to crown touching. I was just using this term last week.
Cheryl, when it comes to wall cabinets routed for glass, how do you prefer to light the interiors of cabinets that are 30″ to 42″ in height? Do you light them from the top or have you installed the latest LED strip lights that attach from the inside of the face frame and back light the entire cabinet? Curious to know your preference.
Bravo Cheryl! This is an excellent article! Finally! How refreshing to hear a take-control designer who doesn’t let the electrician dictate the lighting design. Loved your comments about placement of can lights and using LED’s to replace incandescent lighting and undercabinet puck lights. I have found that, where I have to use fluorescents, they often come in different colors –like warmer yellow tones that can mimick incandescents.
Thanks Pam! I appreciate that coming from a colleague! And yes, electricians can be frustrating. I had some “attitude” from two last week. Then the one, new construction, had wired the oven plug way far from where I had on my plan..tried to bluster until I get the tape..and the pisser is that I was soooo nice about it but did not want sheetrock going up! I mean, I put on my nicest “Sunday go to meetin’ smile…” and nothing but a “oh, well, they had something on opp wall blah blah”..MOVE IT DUDE!
And then, Thurs, the home owner selected electrician ( and I adore this client) gave me the “little lady don’t know nuthin’ “look and attitude and once again, I had on my BESTEST smile and “so happpppy we are using a different guy than my own” smile…It is these times when I challenge myself to see how passive agressive I can be without pissing anyone off. This my friend…is the SOUTH. I have to prove myself to be BETTER than anyone else…including the guys. Sorry but is so true!
LOL –I don’t think it’s just The South. It’s a condition of the whole female half of the human race –especially those of us who ‘intrude’ into traditionally ‘male’ dominated occupations. Geesh –since when did electrical work require heavy lifting?! I think lining up the can lights is just easier for the electrician most of the time and has nothing to do with good design or improved aesthetics.
I think they should teach passive agressive management techniques in design school. Hey if it works….
Usually Pam, I am aggressive-aggressive ! LOL. But really, it gets my dander up..ESP when I have my nicey nice southern gal routine all geared up….sort of like a double whammy!
Laurie; I have used led strips under cabinet but not in the glass front cabinets. Mostly tho due to addl costs. We do mostly frameless construction too. Not sure if would matter? I typ will use Alico xenon pucks but interested in what you are saying with the LEDs!
Great article! Great minds think alike. 🙂 I just finished a post on light layering on Friday. I believe lighting is so important to a kitchen’s design. I agree with you about the halogen puck lights. I like recommending Xenon and LED puck lights.
Unfortunately I was unable to post it because we are having problems with posting to the blog. That’s what happens when you neglect a blog for over a year. Important lesson in blogging – always keep on top of it. I’ll let you know once it is up.
Nice to see someone else who always places recessed cans where they’re needed. I rarely (if ever) do a grid.
Too, our Title 24 Energy Code in California doesn’t allow us to have a kitchen that is entirely incandescent – at least 50% of the lighting must be fluorescent or LED (technically 40 lumens per watt), so until the manufacturers finally catch up, it’s been somewhat limited for lighting for us. Most pendant lights have a max of 100w, which makes it horribly tricky.
I’ve always had good experiences with electricians. I think sometimes they’re used to working with some in our trade that aren’t very knowledgeable and often act on that assumption. Once you prove that you are, then everything’s good. It just takes a bit of the “show-em-what-you’ve-got” as you have.
It’s all about the layering. I’ve turned a new leaf in what I like for lighting. I specified Xenon pucks for undercab and interior lights in my last showroom and it was a royal pain in the Aye, yay, yay! Anyone who has ever tried to replace these little suckers knows of what I speak. I am gun-ho on the Nora LED Tape light. Good for interior cab lights. Place them behind the face frame and they are marvelous. Not good with frameless because you don’t want to see the strip on the side of the cabinet. I won’t use them as task lights for under cab lights if the counter is dark. I don’t like pin dot lights reflection. I like the Philips LED eWProfile Powercore for undercabs. Even lighting and long life. Color temp of 2700K looks pretty good.
And oh, for the record, sexism is alive and well in Cali. Overheard in my last showroom: Male client says to female Designer: “Will your contractor be coming out to verify all of your dimensions?” Yep, “hey little lady” comments are alive and well everywhere. Kelly’s right. Knowledge speaks for itself and soon enough the sexist remarks disappear.
Well Kelly you are in California! Remember I used to live there. Different mindset. In the south, in construction it is tougher to win that respect. With MY people is no prob because they know my skills but new guy… Can be tougher. Always aim to win them over by end of job at least!
So agree! But, Alico xenon are no sweat to change. I have had everyone at shop do it. I like Philllips too though and are putting their new consumer luminaire line in the shop..cool stuff! Everything we do is custom so we have room even in frameless to install the led lights and we have end panel with drop to hide on sides. Again, the alico led is not pin point but some are ..but the price is a choker! Do not get many who want to pay for LED.
As for sexism…I do not know…but around here it really is cumbersome..no matter the knowledge…I have a clear and undisputed reputation in my area but yet, still get the yah-hoos arguing even about codes! Knowledge may win out but is frustrating in the beginning and quite frankly, many of the worst offenders do not care at all if you are knowledgeable or not. It is just in the DNA. My own subs are incredible and they would do anything for us..day or night…so like most contractors, prefer to work with my own whenever possible…it is the team approach for us…and this gets us the best results too! At least I do not get age discrimination:) Ha! I wish!
Trust me, Cheryl, you won’t be all that keen on age discrimination either! I cannot say that I am surprised to read the sexism complaints, but it is still dismaying. Personally, I just look at the work. Either the woman can cut it or she can’t. And lots and lots and lots of them can, so that works for me! I was really just going to tell you how much I learned from this particular blog. In fact I’m going to copy it and save it on my hard disc for when I finally remodel our kitchen. I learned a lot from it. Even if you are a woman (lol). I don’t know… I’m sitting here thinking about all that nonsense, and it still seems so stupid, and especially so now when so many women have established that they know what they’re doing. I mean, hell, you listen to someone rattle off the specifics of whatever the topic is, and they either know or they don’t know. Who the hell cares about male or female in that regard! Thanks again for the lighting tips.
What a nice compliment joseph! Thank you! It is info I use every day so I am happy to share with others! And yes, agism, sexism…they are all over but usually can be overcome!
Great Post and Great discussion in the comments. I get so much BS from contractors and have developed many strategies to deal with it from the ‘sucking up’ “oh you do such good work over here, it will look so great here when you re-do it according to plan” to the very aggressive “not to code, huh? well, why don’t you go out to your truck and get the code book and show me the page? because that’s not what mine says. if you need me to I can drive back to the office and pick it up.” The only times I do not win these are when the client has gotten their own, and won’t back me up/gets into it. Recently did a kitchen with layered lighting, multiple switching. Of course I specified all the switch locations, what gets switched together, etc. Contractor appeared to completely ignore the whole thing on switching. When I went over all the electrical post rough and found all this, pointed out to the client, they understood and were to take it up with their contractor (since they were on hourly and didn’t want to pay me to do it, and since it was there contractor). I go back there at finish and nothing has changed at all, so contractor gave them some reason why I was wrong or they shouldn’t change it, whatever. This is why I vastly prefer full-service jobs. For a fair price the client doesn’t worry about the hourly, it all gets done right, and I’m happy and the clients needs are served better than they even understand or realize in the details. 99% of the time if it gets discussed afterwards, the contractor grudgingly agrees it is better or works my way after all…


Comments
That’s so funny to hear someone else use the word “kiss” in reference to crown touching. I was just using this term last week.
Cheryl, when it comes to wall cabinets routed for glass, how do you prefer to light the interiors of cabinets that are 30″ to 42″ in height? Do you light them from the top or have you installed the latest LED strip lights that attach from the inside of the face frame and back light the entire cabinet? Curious to know your preference.
Bravo Cheryl! This is an excellent article! Finally! How refreshing to hear a take-control designer who doesn’t let the electrician dictate the lighting design. Loved your comments about placement of can lights and using LED’s to replace incandescent lighting and undercabinet puck lights. I have found that, where I have to use fluorescents, they often come in different colors –like warmer yellow tones that can mimick incandescents.
Thanks Pam! I appreciate that coming from a colleague! And yes, electricians can be frustrating. I had some “attitude” from two last week. Then the one, new construction, had wired the oven plug way far from where I had on my plan..tried to bluster until I get the tape..and the pisser is that I was soooo nice about it but did not want sheetrock going up! I mean, I put on my nicest “Sunday go to meetin’ smile…” and nothing but a “oh, well, they had something on opp wall blah blah”..MOVE IT DUDE!
And then, Thurs, the home owner selected electrician ( and I adore this client) gave me the “little lady don’t know nuthin’ “look and attitude and once again, I had on my BESTEST smile and “so happpppy we are using a different guy than my own” smile…It is these times when I challenge myself to see how passive agressive I can be without pissing anyone off. This my friend…is the SOUTH. I have to prove myself to be BETTER than anyone else…including the guys. Sorry but is so true!
LOL –I don’t think it’s just The South. It’s a condition of the whole female half of the human race –especially those of us who ‘intrude’ into traditionally ‘male’ dominated occupations. Geesh –since when did electrical work require heavy lifting?! I think lining up the can lights is just easier for the electrician most of the time and has nothing to do with good design or improved aesthetics.
I think they should teach passive agressive management techniques in design school. Hey if it works….
Usually Pam, I am aggressive-aggressive ! LOL. But really, it gets my dander up..ESP when I have my nicey nice southern gal routine all geared up….sort of like a double whammy!
Laurie; I have used led strips under cabinet but not in the glass front cabinets. Mostly tho due to addl costs. We do mostly frameless construction too. Not sure if would matter? I typ will use Alico xenon pucks but interested in what you are saying with the LEDs!
Great article! Great minds think alike. 🙂 I just finished a post on light layering on Friday. I believe lighting is so important to a kitchen’s design. I agree with you about the halogen puck lights. I like recommending Xenon and LED puck lights.
Thanks Melissa! I will check out your blog! Cheryl
Unfortunately I was unable to post it because we are having problems with posting to the blog. That’s what happens when you neglect a blog for over a year. Important lesson in blogging – always keep on top of it. I’ll let you know once it is up.
Good points!
Nice to see someone else who always places recessed cans where they’re needed. I rarely (if ever) do a grid.
Too, our Title 24 Energy Code in California doesn’t allow us to have a kitchen that is entirely incandescent – at least 50% of the lighting must be fluorescent or LED (technically 40 lumens per watt), so until the manufacturers finally catch up, it’s been somewhat limited for lighting for us. Most pendant lights have a max of 100w, which makes it horribly tricky.
I’ve always had good experiences with electricians. I think sometimes they’re used to working with some in our trade that aren’t very knowledgeable and often act on that assumption. Once you prove that you are, then everything’s good. It just takes a bit of the “show-em-what-you’ve-got” as you have.
It’s all about the layering. I’ve turned a new leaf in what I like for lighting. I specified Xenon pucks for undercab and interior lights in my last showroom and it was a royal pain in the Aye, yay, yay! Anyone who has ever tried to replace these little suckers knows of what I speak. I am gun-ho on the Nora LED Tape light. Good for interior cab lights. Place them behind the face frame and they are marvelous. Not good with frameless because you don’t want to see the strip on the side of the cabinet. I won’t use them as task lights for under cab lights if the counter is dark. I don’t like pin dot lights reflection. I like the Philips LED eWProfile Powercore for undercabs. Even lighting and long life. Color temp of 2700K looks pretty good.
And oh, for the record, sexism is alive and well in Cali. Overheard in my last showroom: Male client says to female Designer: “Will your contractor be coming out to verify all of your dimensions?” Yep, “hey little lady” comments are alive and well everywhere. Kelly’s right. Knowledge speaks for itself and soon enough the sexist remarks disappear.
Well Kelly you are in California! Remember I used to live there. Different mindset. In the south, in construction it is tougher to win that respect. With MY people is no prob because they know my skills but new guy… Can be tougher. Always aim to win them over by end of job at least!
So agree! But, Alico xenon are no sweat to change. I have had everyone at shop do it. I like Philllips too though and are putting their new consumer luminaire line in the shop..cool stuff! Everything we do is custom so we have room even in frameless to install the led lights and we have end panel with drop to hide on sides. Again, the alico led is not pin point but some are ..but the price is a choker! Do not get many who want to pay for LED.
As for sexism…I do not know…but around here it really is cumbersome..no matter the knowledge…I have a clear and undisputed reputation in my area but yet, still get the yah-hoos arguing even about codes! Knowledge may win out but is frustrating in the beginning and quite frankly, many of the worst offenders do not care at all if you are knowledgeable or not. It is just in the DNA. My own subs are incredible and they would do anything for us..day or night…so like most contractors, prefer to work with my own whenever possible…it is the team approach for us…and this gets us the best results too! At least I do not get age discrimination:) Ha! I wish!
Trust me, Cheryl, you won’t be all that keen on age discrimination either! I cannot say that I am surprised to read the sexism complaints, but it is still dismaying. Personally, I just look at the work. Either the woman can cut it or she can’t. And lots and lots and lots of them can, so that works for me! I was really just going to tell you how much I learned from this particular blog. In fact I’m going to copy it and save it on my hard disc for when I finally remodel our kitchen. I learned a lot from it. Even if you are a woman (lol). I don’t know… I’m sitting here thinking about all that nonsense, and it still seems so stupid, and especially so now when so many women have established that they know what they’re doing. I mean, hell, you listen to someone rattle off the specifics of whatever the topic is, and they either know or they don’t know. Who the hell cares about male or female in that regard! Thanks again for the lighting tips.
What a nice compliment joseph! Thank you! It is info I use every day so I am happy to share with others! And yes, agism, sexism…they are all over but usually can be overcome!
perfect article! very informative..thanks! 🙂
Great Post and Great discussion in the comments. I get so much BS from contractors and have developed many strategies to deal with it from the ‘sucking up’ “oh you do such good work over here, it will look so great here when you re-do it according to plan” to the very aggressive “not to code, huh? well, why don’t you go out to your truck and get the code book and show me the page? because that’s not what mine says. if you need me to I can drive back to the office and pick it up.” The only times I do not win these are when the client has gotten their own, and won’t back me up/gets into it. Recently did a kitchen with layered lighting, multiple switching. Of course I specified all the switch locations, what gets switched together, etc. Contractor appeared to completely ignore the whole thing on switching. When I went over all the electrical post rough and found all this, pointed out to the client, they understood and were to take it up with their contractor (since they were on hourly and didn’t want to pay me to do it, and since it was there contractor). I go back there at finish and nothing has changed at all, so contractor gave them some reason why I was wrong or they shouldn’t change it, whatever. This is why I vastly prefer full-service jobs. For a fair price the client doesn’t worry about the hourly, it all gets done right, and I’m happy and the clients needs are served better than they even understand or realize in the details. 99% of the time if it gets discussed afterwards, the contractor grudgingly agrees it is better or works my way after all…
Thanks Brenda for the great comments!
Comments are closed.